
22 min read
Layer Masks
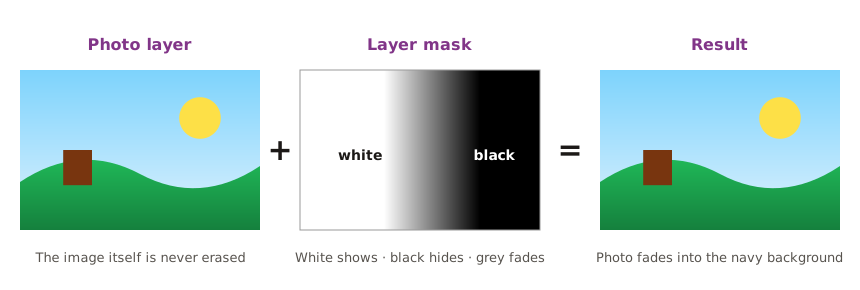
Hide and reveal parts of a layer without deleting anything: black hides, white reveals, grey fades.
What Is a Layer Mask?
Why Not Just Erase?
Eraser vs layer mask
| Eraser | Layer mask |
|---|---|
| Destructive — pixels are deleted | Non-destructive — pixels are only hidden |
| Mistakes are permanent once the file is saved | Paint white to bring any part back at any time |
| Hard, jagged or uneven edges | Soft fades with a gradient or soft brush |
Adding and Painting a Mask
- Select the layer (for example Photo — robot team).
- Click Add layer mask (the rectangle with a circle) at the bottom of the Layers panel. A white mask thumbnail appears next to the layer.
- Click the mask thumbnail so you are painting on the mask, not the photo (it gets a white frame).
- Choose the Brush (B) with a soft edge. Press D for default colours (black and white) and X to swap them.
- Paint black to hide, white to reveal. Lower the brush opacity to paint grey for partial hiding.
If you have a selection when you click Add layer mask, Photoshop makes a mask that shows only the selected area — the quickest way to cut out a subject.
A Smooth Fade with a Gradient
To make the bottom of the photo fade gently into the navy background: select the mask, choose the Gradient tool (G) with a black-to-white gradient, and drag from where you want the photo to disappear up to where it should be fully visible.
Practice
What does grey on a layer mask do?
More lessons in Adobe Photoshop · Next: Adjustment Layers · Previous: Move and Free Transform